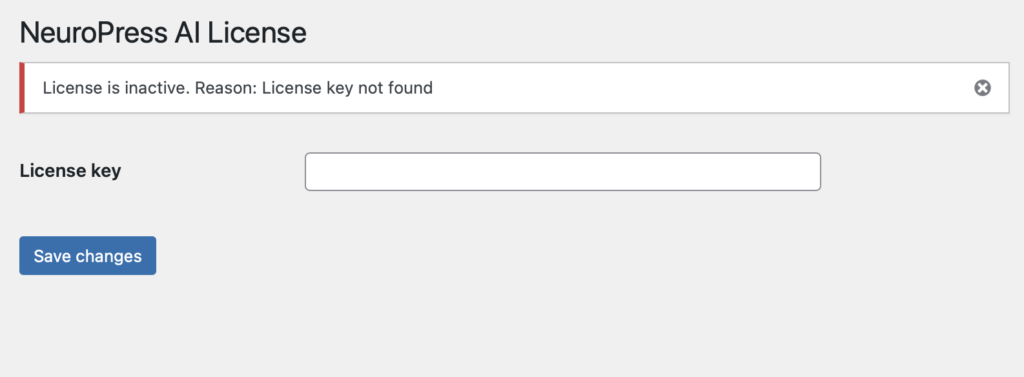
To unlock the full capabilities of the NeuroPress AI plugin, you need to activate it with a valid license key. Here’s a step-by-step guide on how to enter and activate your license:
1. Navigate to the License Settings
• In your WordPress dashboard, go to “NeuroPress AI” in the sidebar menu, then select “License”.
2. Enter Your License Key
• On the License page, you will find a field labeled “License key”. Enter the license key that was sent to you via email upon purchase.

3. Save Changes
• After entering the key, click the “Save changes” button to validate and store your license key.
4. License Verification
• Once you save the changes, the plugin will automatically check the status of your license. If the license is valid, the plugin will be fully activated, and you will have access to all features.
• If there is an issue with the license, a message will appear at the top of the page, like the one in the image: “License is inactive. Reason: License key not found.” This indicates that the license key could not be verified. Double-check the key you entered and try again.
5. Troubleshooting
• If your license does not activate, ensure that the key was copied correctly from the email, including any hyphens or special characters. If you continue to experience issues, contact NeuroPress AI support for assistance.
By following these steps, you can ensure that your NeuroPress AI plugin is fully activated and ready to use, allowing you to take full advantage of its advanced AI-powered features.